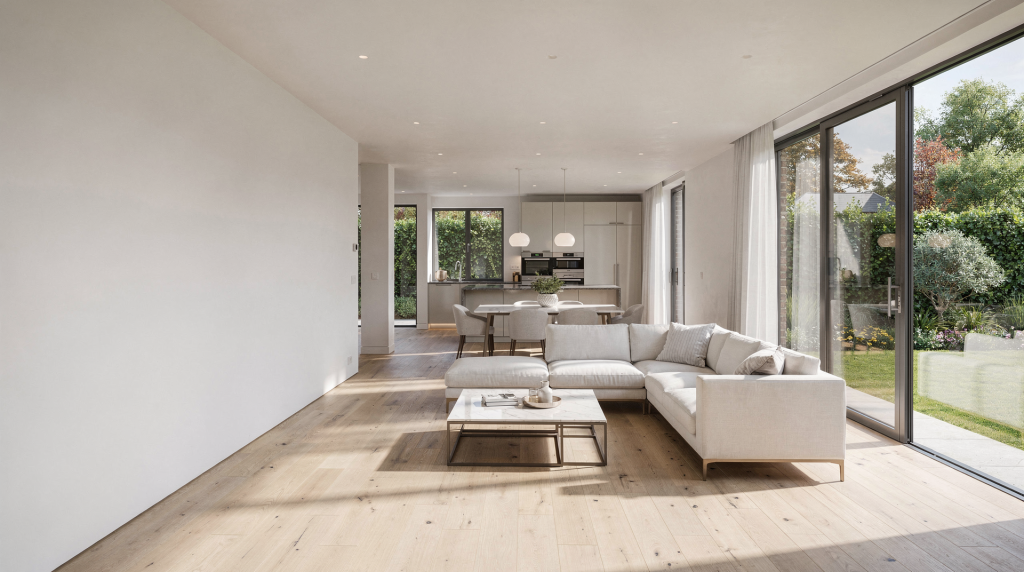
Architectural photography is one of the fastest ways to make a real estate listing feel more valuable, more credible, and easier to remember. Done well, it shows the structure, light, layout, and atmosphere of a property without distorting what buyers will actually see in person.
For real estate listings, the goal is not to create abstract “art shots.” The goal is to make spaces look clear, inviting, and accurately represented so buyers can understand the home quickly and feel confident booking a viewing.
What Architectural Photography Means in Real Estate
Architectural photography focuses on how a building and its interiors are shaped by light, lines, materials, and space. In real estate marketing, that usually means wide, clean images that show the flow of a property, not just isolated decorative details.
Unlike lifestyle photography, this work is less about people and more about structure. The camera is used to show scale, depth, and usability. A strong architectural image should help a buyer answer practical questions like:
- How big does the room feel?
- Where does the natural light come from?
- How do rooms connect?
- What are the strongest features of the property?
That practical value is why architectural photography is so effective for listings, especially in competitive markets.
Why It Matters for Real Estate Listings
A listing often gets only a few seconds of attention before a buyer decides whether to click. The images need to do more than look nice—they need to communicate the property fast.
Architectural photography helps because it can:
- Make a listing feel more premium
- Show layout more clearly than casual snapshots
- Reduce confusion about room size and flow
- Highlight design details that add perceived value
- Build trust through accurate representation
A home can be staged beautifully and still feel flat if the photos are poorly lit, crooked, or cramped. On the other hand, a modest property can feel much stronger when the images are balanced, straight, and thoughtfully composed.
The Core Principles of Strong Architectural Photography
Good real estate architectural photography usually comes down to a few fundamentals. If these are handled well, the images will already be better than most listing photos.
1. Use light intentionally
Light is the foundation of the image. Interior architectural photography often relies on a mix of daylight from windows and artificial room lighting, and many photographers use supplemental light to balance dark corners and color casts.
In practice, that means:
- Shoot when natural light is soft, not harsh
- Open blinds and curtains before shooting
- Turn on lights only when they help the room feel natural
- Avoid mixed lighting that creates ugly color shifts
Harsh midday sun can produce blown highlights and hard shadows, while softer light usually gives better results for interiors and exteriors alike.
2. Keep vertical lines straight
One of the quickest ways to make a property photo feel unprofessional is to let walls, door frames, and window edges lean inward or outward.
A simple rule:
- Vertical lines should look vertical
- Horizontal lines should stay level
- The frame should feel stable, not tilted
This is especially important in architectural work because the geometry of the space is part of the subject.
3. Show space, not clutter
Real estate architectural photography works best when the room feels open and easy to read. That means removing distractions before the camera comes out.
Before shooting:
- Clear counters
- Hide trash bins, cords, and personal items
- Straighten furniture
- Remove excess decor
- Make beds and smooth fabrics
The less visual noise in the frame, the easier it is for buyers to see the property itself.
4. Shoot for flow and orientation
Buyers do not just want pretty photos. They want to understand how the home works.
Good coverage usually includes:
- Wide shots of main rooms
- Angles that show adjoining spaces
- Hallways or transitions between rooms
- Exterior frames that establish context
- Detail shots of standout features
A strong set of images should help someone mentally walk through the property.
Best Camera Settings and Shooting Approach
You do not need the most expensive gear to get good architectural listing photos, but you do need a controlled approach.
| Element | Practical recommendation | Why it matters |
|---|---|---|
| Camera support | Tripod | Keeps images sharp and consistent |
| Lens choice | Wide-angle lens, used carefully | Helps show room structure without distortion |
| Aperture | Mid-range settings like f/7.1 to f/11 | Keeps more of the room in focus |
| ISO | As low as possible | Reduces noise in shadows and walls |
| White balance | Set intentionally, not left on auto | Prevents mixed-color interiors |
| Framing | Level camera, corrected perspective | Maintains straight lines and professional structure |
A tripod is especially important. It slows the process slightly, but it gives you repeatability, better sharpness, and more control over composition.
Exterior Architectural Photos: What to Prioritize
Exterior images are often the first visual impression in a listing. They need to feel clean, balanced, and welcoming.
Good exterior shots usually include:
- A front elevation or flattering front angle
- A wider contextual shot showing landscaping and approach
- A dusk or twilight image if the lighting is right
- A shot that clearly shows entry and curb appeal
Watch out for:
- Parked cars blocking the front
- Garbage bins, hoses, or tools in view
- Strong shadows cutting across the façade
- Crooked horizons
- Over-editing skies or grass
Exterior work should feel honest and polished. If the house looks dramatically different in the image than in person, buyers will notice.
Interior Architectural Photography: What Buyers Need to See
Interior photos should explain how the home feels to occupy. The best images are usually the ones that show both the function of the room and the way light shapes it.
Strong interior coverage often includes:
- Living room
- Kitchen
- Primary bedroom
- Primary bathroom
- Secondary bedrooms
- Key circulation areas
- Special features such as staircases, fireplaces, built-ins, or views
Composition tips for interiors
- Shoot from a corner when possible to show depth
- Lower the camera enough to avoid a floating perspective
- Include enough foreground to anchor the room
- Avoid over-filling the frame with furniture
- Use doors and openings to guide the eye
A useful rule: the room should feel spacious, but not empty. If the photo removes too much context, the property loses personality. If it includes too much clutter, it loses clarity.
Lighting Methods: Natural Light, Flash, and Blending
There are several practical ways to light a property interior. Each has strengths and limitations.
Natural light only
This works well when the room has strong, even daylight and the windows are not creating severe contrast.
Best for:
- Bright condos
- Minimalist interiors
- Homes with large windows
- Soft overcast conditions
Limitation:
- Bright windows can blow out quickly
- Dark corners may stay underexposed
Flash-assisted shooting
A flash or strobe can help fill shadows and create more even light across the room. It is especially useful when natural light is weak or mixed.
Best for:
- Dark interiors
- Rooms with multiple light sources
- Spaces with strong color casts
Limitation:
- Poor flash use can make spaces look artificial
- Reflections and hotspots need careful control
Blended exposures
Many professionals blend several exposures in post-production to balance interior brightness and window detail. This is common in architectural work because the camera often cannot capture the full range of light in one shot.
Best for:
- High-end listings
- Rooms with bright views and darker interiors
- Polished marketing imagery
Limitation:
- Requires more editing skill
- Easy to overdo if the goal becomes perfection instead of realism
A Practical Workflow for Listing Shoots
A repeatable workflow saves time and improves consistency. Here is a simple structure that works well on most properties.
Before the shoot
- Walk through the property and identify the best angles.
- Remove clutter and correct obvious distractions.
- Turn on lights that improve the room.
- Open blinds and curtains.
- Check mirrors and reflective surfaces for unwanted objects.
- Decide which rooms are essential for the listing.
During the shoot
- Start with the exterior while the light is best.
- Move through public spaces first.
- Capture wide angles before details.
- Shoot multiple framings of important rooms.
- Review images on site for crooked lines, blur, or exposure issues.
After the shoot
- Correct perspective and level horizons.
- Balance exposure without flattening the image.
- Adjust white balance so walls look natural.
- Remove small distractions only when necessary.
- Keep retouching realistic.
This workflow matters because property shoots are usually time-sensitive. A simple system prevents missed shots and inconsistent results.
Common Mistakes to Avoid
Architectural photography for real estate looks simple from the outside, but a few repeated mistakes can undermine the whole set.
1. Shooting too high
When the camera is too high, rooms often look awkward and top-heavy. Lower positions usually create a more natural sense of scale.
2. Over-wide distortion
Ultra-wide framing can make rooms look bigger, but it can also warp furniture and walls. Use wide-angle lenses carefully and avoid stretching the image in post.
3. Bad color balance
Mixed daylight and tungsten can make walls look orange, green, or gray. Correcting white balance is one of the most important steps in editing.
4. Heavy-handed editing
If the listing photo looks airbrushed, buyers lose trust. The image should be clean, not fake.
5. Ignoring small details
A crooked lamp, open toilet lid, visible cable, or dirty mirror can distract from an otherwise good photo.
6. Incomplete coverage
A beautiful kitchen image is not enough if the listing lacks the rooms buyers expect to see. Coverage should answer the full question: what does this property offer?
Editing Rules That Keep the Images Credible
Editing is part of the process, but it should refine the photo, not reinvent the property.
Keep editing focused on:
- Straightening
- Exposure correction
- Color correction
- Shadow recovery
- Minor object cleanup
- Consistent tone across the set
Avoid:
- Unrealistic sky replacements
- Extreme saturation
- Fake brightness that removes depth
- Excessive distortion correction that changes proportions
- Retouching that hides permanent property issues
The best edited real estate architectural photos still look believable. A buyer should feel impressed, not misled.
When Architectural Photography Is the Right Choice
This approach is especially useful when the property has:
- Distinct design value
- Strong natural light
- High-end finishes
- Interesting geometry
- A layout worth showcasing
- A story that depends on visual presentation
It is also valuable for:
- Luxury homes
- New developments
- Boutique rentals
- Design-led apartments
- Commercial spaces marketed through visual appeal
For basic rental listings or very small spaces, a simpler real estate photo approach may be enough. But when the property competes on design, atmosphere, or premium positioning, architectural photography gives the listing a clear advantage.
Quick Pre-Shoot Checklist
- Clean every visible surface
- Open curtains and blinds
- Turn on relevant lights
- Remove personal items
- Straighten furniture and decor
- Check mirrors and reflective surfaces
- Bring a tripod
- Confirm battery and memory card status
- Plan the best light window
- Verify which rooms must be photographed
FAQ
What is the difference between architectural photography and real estate photography?
Architectural photography focuses more on design, structure, light, and form, while real estate photography is usually broader and more sales-oriented. In listing work, the two often overlap.
Do I need a wide-angle lens for interior listing photos?
Usually yes, but it should be used with restraint. A wide-angle lens helps show the room, but too much width can distort walls and furniture.
Should I shoot interiors with natural light only?
Not always. Natural light is often ideal, but many interiors benefit from flash or blended exposures when windows are too bright or rooms are too dark.
How many photos should a real estate listing include?
It depends on the property, but the set should cover key rooms, the exterior, and any features that justify the price or improve buyer understanding.
Is editing necessary for architectural listing photos?
Yes, but only to refine the image. Good editing corrects exposure, perspective, and color without making the property look unrealistic.
Final Takeaway
Architectural photography for real estate listings is about clarity, credibility, and presentation. The best images show the property honestly, use light intelligently, keep lines clean, and help buyers understand the space at a glance.
If you treat every shot as a visual explanation of the home, not just a pretty frame, the listing becomes easier to trust—and much easier to remember.