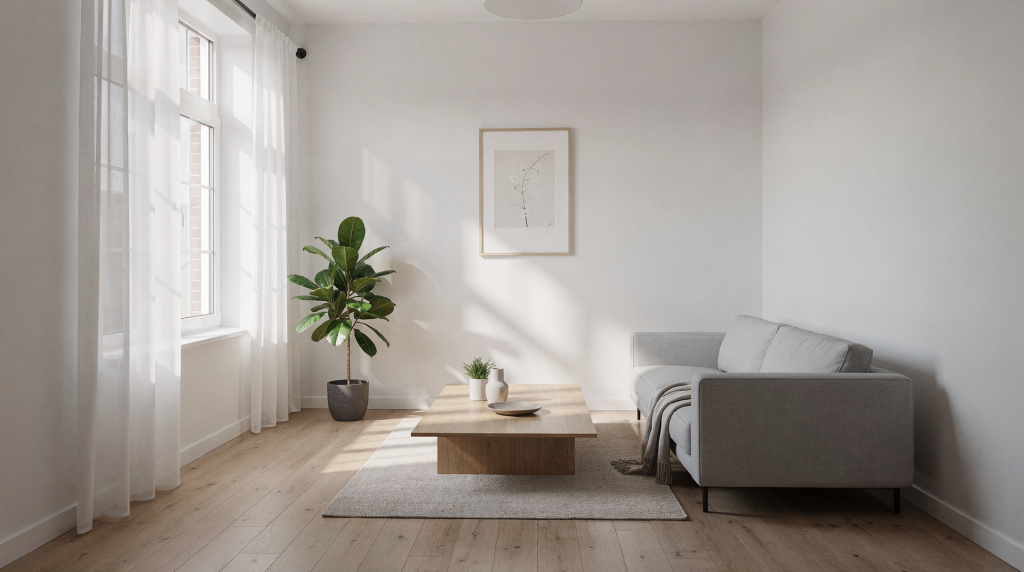
Small rooms are not a problem to hide; they are a problem to interpret correctly. The goal is not to make the space look fake, but to photograph it in a way that shows depth, light, and usable area without exaggeration. I’ve walked into plenty of compact bedrooms and narrow bathrooms where the agent was convinced we’d need a miracle. Most of the time, the miracle was just a combination of preparation, lens choice, and camera position—applied with a clear understanding of how the eye reads space.
Why small rooms feel bigger in photos
A room feels larger when the viewer can read its boundaries easily. That usually comes from three things: open sightlines, balanced light, and a camera position that shows more floor, walls, and ceiling without distortion.
In practice, the eye reads space through perspective. If the frame is cramped, dark, or tilted, the room feels tighter than it is. If the image feels clean, bright, and structurally clear, the same room appears more generous. I’ve seen this play out countless times: two photos of the same 10-square-meter bedroom, one looking like a storage closet and the other like a calm, functional retreat. The difference was never the room itself—it was the decisions made behind the camera.
Start with the room, not the camera
Before touching settings, fix the room itself. A small bedroom, bath, or office photograph best when the visible surfaces are calm and uncluttered. This step gets skipped more often than you’d think, especially when schedules are tight. But the ten minutes you spend clearing a nightstand or hiding a cable bundle will save you far more time in post-production—and the result will look intentional rather than rushed.
Prep checklist
- Remove extra furniture that blocks walking paths.
- Clear counters, nightstands, and tabletops.
- Hide cables, bins, cleaning products, and personal items.
- Open blinds and curtains fully.
- Turn on every usable light, including lamps.
- Clean mirrors, glass, and windows.
- Straighten rugs, chair legs, and bed corners.
- Leave a few intentional objects instead of filling every surface.
A compact room often looks larger simply because there is more negative space. Negative space is the visible “breathing room” between objects. When every surface is covered, the eye has nowhere to rest, and the room reads as chaotic rather than cozy. I usually tell agents: if you’re staging a small space, think subtraction first. One well-placed vase on a bedside table does more for the photo than five decorative items competing for attention.
Choose the right lens
For most interior work, a wide-angle lens is the practical starting point. On a full-frame camera, many photographers work in the 16mm to 24mm range for balanced interior views. For very tight rooms, something around 14mm or wider can help when you cannot step back enough.
That said, wider is not always better. Ultra-wide lenses can stretch walls, bend doorframes, and make furniture look unnaturally small. The goal is to show the room honestly, not to create a dramatic fisheye effect. I’ve watched photographers reach for a 12mm lens in a small bathroom and end up with an image that looked more like a funhouse mirror than a listing photo. The buyer needs to trust what they’re seeing, and that trust starts with glass choice.
Lens guide for small rooms
| Room size / situation | Practical focal length | What it does well | Main risk |
|---|---|---|---|
| Medium small room | 16–24mm full frame | Good balance of coverage and realism | Slight edge distortion |
| Very tight room | Around 14mm or wider full frame | Captures more of the space | Can exaggerate proportions |
| If you can step back | Longer end of wide range | Cleaner geometry | Less room in frame |
Find the best shooting angle
The angle matters as much as the lens. In small rooms, the strongest view is often from a corner or near a doorway, aimed diagonally across the room. That lets the camera capture the longest possible sightline and gives the image more depth. When I walk into a compact space, my first move is always to scan for the longest diagonal—the line that pulls the eye from foreground to background without interruption.
Avoid shooting flat into a wall unless that wall has a clear feature worth highlighting. A straight-on wall shot tends to flatten the room and make it feel boxy. This is one of the most common mistakes I see in agent-taken photos: they stand in the doorway, point the camera straight ahead, and capture a wall with a bed pushed against it. The result is a two-dimensional rectangle that tells the viewer nothing about the actual volume of the room.
Good angle choices
- Shoot from a corner toward the opposite corner.
- Use a doorway as a frame when it gives you more distance.
- Capture corners, not just the center of the room.
- Make sure at least one major opening, window, or secondary wall is visible.
- Keep furniture lines leading into the frame rather than blocking it.
Get the camera height right
Camera height changes the amount of floor and wall visible in the frame. In small rooms, a slightly lower position often works better than eye level because it reveals more floor and can make ceilings feel higher. This is a subtle adjustment that many beginners overlook, but it has an outsized impact on how spacious the room reads.
A common practical range is around chest height, roughly 3 to 4 feet off the floor. That usually keeps the room proportional without making it feel like the camera is looking down on it. I tend to set my tripod around 100–120 cm and then fine-tune based on what I see in the frame—if the floor feels compressed or the ceiling feels low, I’ll drop the camera another few centimeters.
Camera height rules
- Too high: the room can feel flattened and the floor disappears.
- Too low: furniture may look stretched and the perspective becomes awkward.
- Moderate height: the space reads naturally and feels more open.
Keep the camera level
One of the fastest ways to make a room look smaller is to tilt the camera up or down. Vertical lines start leaning, walls feel distorted, and the room loses architectural clarity. This is especially punishing in narrow spaces like hallways and bathrooms, where converging verticals can make the walls feel like they’re closing in on the viewer.
Use a tripod and keep the camera level. If your camera or phone has a grid, turn it on. Make sure doorframes, cabinets, and wall edges stay vertical. This is especially important in bathrooms, hallways, and narrow bedrooms where even a small tilt is easy to notice. I’ve trained myself to check the edges of the frame before every shot—if a doorframe isn’t parallel to the edge of the viewfinder, I adjust until it is.
Use light to create breathing room
Light is one of the most powerful tools for making a small room feel larger. Bright, even light opens up shadows and helps viewers see the shape of the space. When a room is poorly lit, shadows pool in corners and the boundaries of the room become ambiguous—the space feels smaller because the eye can’t fully map it.
Practical lighting approach
- Use daylight whenever possible.
- Open curtains and blinds before shooting.
- Turn on lamps to soften dark corners.
- Avoid harsh overhead-only lighting when it creates heavy shadows.
- Balance window light and interior lights so the room does not feel patchy.
If one window is much brighter than the rest of the room, diffuse it or shoot when direct sun has moved away. Strong blown-out windows can shrink the room visually because the eye gets pulled outside the frame. I often wait for a cloud to pass or use a sheer curtain to soften the light—anything that keeps the window from becoming a white hole that dominates the composition.
Shape the room for depth
Small rooms photograph better when they have layers. A foreground object, a middle area, and a background wall give the image more depth than a flat empty box. This layering is what separates a snapshot from a photograph that makes someone want to walk into the room.
Ways to add depth without clutter
- Place a chair or lamp partly in the frame.
- Keep a doorway visible in the background.
- Angle a bed, sofa, or desk so it leads the eye inward.
- Use mirrors carefully to reflect light, not mess.
- Choose slender furniture over bulky pieces when staging.
Mirrors can help, but only when they reflect something useful. A mirror that shows clutter or a bright light source will work against you. I’ve repositioned mirrors on-site more times than I can count—sometimes angling them toward a window to bounce light, other times removing them entirely because they were reflecting a messy corner that couldn’t be cleaned in time.
Edit for realism, not exaggeration
Editing should refine the room, not reinvent it. Brighten shadows, correct white balance, straighten lines, and control highlights from windows. Avoid pushing the image so far that walls look warped or floors look artificially wide. The line between enhancement and deception is thin, and crossing it erodes trust with potential buyers.
Safe edits for small-room photos
- Straighten verticals and horizontals.
- Correct color temperature so whites look clean, not blue or orange.
- Recover detail in bright windows.
- Lift shadow areas slightly.
- Remove tiny distractions like scuffs or dust.
- Keep proportions believable.
Common editing mistakes
- Over-widening the image in post.
- Making the room too bright and flat.
- Removing all contrast, which kills dimension.
- Over-smoothing textures on walls and floors.
- Cropping too tightly and losing the feeling of space.
Room-by-room approach
Different small rooms need different priorities. The principles stay the same, but the execution shifts depending on what the room is for and where the natural focal points lie.
Bedrooms
- Show the bed placement and walking space.
- Keep bedding tight and simple.
- Avoid including too many decorative items.
- Shoot from the doorway corner when possible.
Bathrooms
- Keep the mirror clean and the countertop nearly empty.
- Capture the vanity, shower, and a sense of floor area.
- Use even lighting to reduce harsh reflections.
- Watch for crooked lines around tiles and cabinets.
Kitchens
- Clear counters aggressively.
- Show work surfaces and cabinet depth.
- Avoid angles that make appliances look crushed together.
- Use light to keep the room from feeling closed in.
Home offices
- Show desk placement and usable floor space.
- Remove cables, bags, and stacked paper.
- Highlight windows if they bring in daylight.
- Keep the setup minimal and purposeful.
Quick shooting workflow
- Prepare the room and remove distractions.
- Open all light sources and let daylight in.
- Set up a tripod and level the camera.
- Choose a corner or doorway with the longest view.
- Start with a wide but realistic focal length.
- Check the frame for vertical lines and visible floor space.
- Take multiple exposures if the window is brighter than the room.
- Review for distortion, clutter, and uneven light.
- Edit lightly and keep the room believable.
Checklist: did the room get bigger in the photo?
- The room has a clear diagonal view.
- Vertical lines are straight.
- The camera is level.
- The frame includes enough floor to show openness.
- Light is even across the room.
- Clutter is minimal.
- No single wall dominates the frame.
- Furniture supports depth instead of blocking it.
FAQ
What is the best lens for small room photography?
A wide-angle lens in the 16mm to 24mm range on full frame is a strong starting point. For very tight spaces, around 14mm can help if distortion is controlled.
Should I shoot from the doorway or the corner?
Use whichever gives the longest visible diagonal. In most cases, a corner view creates more depth, but a doorway can work well when the room is extremely tight.
Why does my room look smaller than it is?
The most common reasons are poor light, tilted verticals, clutter, and shooting straight at a wall. A cramped composition can also make the room feel smaller than the physical space.
Does wide-angle always make a room look bigger?
It helps show more of the room, but too much width can distort the space. The best result is a wide lens used with good composition and a level camera.
How do I make a narrow room feel wider?
Shoot diagonally, clear the center path, lower the camera slightly, and keep the frame bright and uncluttered. Avoid compositions that trap the viewer between parallel walls.
Conclusion
To photograph a small room so it feels larger, focus on three things: clean preparation, smart perspective, and controlled light. When the room is uncluttered, the camera is level, and the frame shows depth instead of walls, even a compact space can look open, calm, and inviting.